Automate Amazon ECS cluster creation with a custom docker image using AWS CDK
Docker containers help us to create portable and isolated environments for deploying our applications. Since containers provide the flexibility to run applications efficiently across computing environments, containerizing applications is a good practice to avoid wastage of resources and also to scale applications faster.
AWS Elastic container services (ECS) is a container orchestration service that allows you to run containerized applications on AWS. It is a highly scalable, high-performance container orchestration service that allows you to easily run applications on managed clusters. ECS is a fully managed service that makes it easy for you to run, stop, and manage Docker containers.
AWS CDK is a software development framework that helps to define cloud infrastructure as code and provision it through AWS CloudFormation.
In this article, we will learn how to automate the creation of ECS clusters with a custom docker image using AWS CDK.
Prerequisites
You will need the following to follow along with this tutorial:
- AWS account
- AWS CLI
- Node.js
- AWS CDK
- Docker
GitHub Link
Find the code for the entire project here
Docker Image
For the purpose of this article, we will create a Docker image that will install apache web server on an Ubuntu environment.
Let's start by choosing Ubuntu as our base image.
FROM ubuntu:latest
Next, let's install the apache web server
RUN apt-get update && apt-get install -y apache2
We will now define which port the container should expose
EXPOSE 80
Finally, let's start the web server
CMD ["/usr/sbin/apache2ctl", "-D", "FOREGROUND"]
So, our Dockerfile will look like this:
FROM ubuntu:latest

# install apache2

RUN apt-get update && apt-get install -y apache2

# port number the container should expose
EXPOSE 80

# run apache2
CMD ["/usr/sbin/apache2ctl", "-D", "FOREGROUND"]
Initialize a CDK project
Let's go ahead and create a new directory to initialize a new CDK project.
You can use the following command to initialize a CDK project
cdk init app --language=[csharp|fsharp|go|java|javascript|python|typescript]
Great! This will set up a set of folders for you. The lib folder will be where most of the fun will happen. Let's get started!

Main stack
This is the stack where you will build the docker image, push it to ECR and create ECS using the docker image.
We will need to import the following dependencies.
import * as cdk from 'aws-cdk-lib';
import { Construct } from 'constructs';
import * as ecs from 'aws-cdk-lib/aws-ecs';
import * as ecr from 'aws-cdk-lib/aws-ecr';
import { DockerImageAsset } from 'aws-cdk-lib/aws-ecr-assets';
import * as path from 'path';
import * as ecrdeploy from 'cdk-ecr-deployment';
import * as iam from 'aws-cdk-lib/aws-iam';
import * as alb from 'aws-cdk-lib/aws-elasticloadbalancingv2';
import * as ec2 from 'aws-cdk-lib/aws-ec2';
Next, we will start with building the docker image.
export class WebserverEcsStack extends cdk.Stack {
  constructor(scope: Construct, id: string, props?: cdk.StackProps) {
    super(scope, id, props);

    // Build docker image
    const asset = new DockerImageAsset(this, 'MyBuildImage', {
      directory: path.join("image", ''),
    });
For our ECS cluster to use the docker image, we will have to push the image to a location where ECS can access it. For this, we will use an ECR repository.
ECR repository is a fully managed container registry that provides high-performance hosting to deploy your applications easily.
Note that when you're building the docker image, you should have docker running in your system. CDK uses docker to build the image and push it to ECR.
    // Create ECR repository
    const ecrRepo = new ecr.Repository(this, 'WebserverEcrRepo', {
      repositoryName: 'webserver-ecr-repo',
    });

    // Deploy docker image to ECR
    new ecrdeploy.ECRDeployment(this, 'DeployImage', {
      src: new ecrdeploy.DockerImageName(asset.imageUri),
      dest: new ecrdeploy.DockerImageName(`${cdk.Aws.ACCOUNT_ID}.dkr.ecr.ap-south-1.amazonaws.com/webserver-ecr-repo:latest`),
    });
Our ECR repository will be now ready with the docker image. We will now move on and create an ECS cluster to run our container in it.
    // Create ECS cluster
    const cluster = new ecs.Cluster(this, 'WebserverEcsCluster', {
      clusterName: 'webserver-ecs-cluster',
    });
ECS clusters need a task definition to run docker containers. You can configure how your container should run in a task definition.
Read more about task definition here
    // Create ECS task definition
    const taskDefinition = new ecs.FargateTaskDefinition(this, 'WebserverTaskDef', {
      memoryLimitMiB: 512,
      cpu: 256,
      runtimePlatform: {
        operatingSystemFamily: ecs.OperatingSystemFamily.LINUX,
        cpuArchitecture: ecs.CpuArchitecture.ARM64,
      },
    });
Next, we will specify more details about our container to the task definition using a container definition. This can come in handy if you want to run multiple containers.
    // Create ECS container definition
    const containerDefinition = taskDefinition.addContainer('WebserverContainer', {
      image: ecs.ContainerImage.fromEcrRepository(ecrRepo),
      memoryLimitMiB: 512,
      cpu: 256,
      logging: ecs.LogDrivers.awsLogs({
        streamPrefix: 'webserver-ecs',
      }),
      portMappings: [
        {
          containerPort: 80,
          hostPort: 80,
        },
      ],
    });
Awesome! Now our task definition will be ready to initiate our cluster. Let's move ahead and use the above task definition to create our ECS service.
ECS service can be used to run and manage a specified number of instances of a task definition simultaneously in an ECS cluster.
    // Create ECS service
    const service = new ecs.FargateService(this, 'WebserverService', {
      cluster: cluster,
      taskDefinition: taskDefinition,
      desiredCount: 1,
      serviceName: 'webserver-service',
      assignPublicIp: true,
    });
Great! Now we will have a running ECS service.
We can attach a Load balancer so that it can distribute the incoming traffic evenly to all the instances of our cluster. This will be helpful to serve a large group of clients as it improves the availability of our application.
    // Create ECS load balancer
    const loadBalancer = new alb.ApplicationLoadBalancer(this, 'WebserverLoadBalancer', {
      vpc: cluster.vpc,
      internetFacing: true,
    });

    // Create ECS listener
    const listener = loadBalancer.addListener('WebserverListener', {
      port: 80,
    });

    // Create ECS target group
    const targetGroup = listener.addTargets('WebserverTargetGroup', {
      port: 80,
      targets: [service],
      healthCheck: {
        path: '/',
        interval: cdk.Duration.seconds(60),
        timeout: cdk.Duration.seconds(5),
        healthyHttpCodes: '200',
      },
    });

    // Create ECS security group
    const securityGroup = new ec2.SecurityGroup(this, 'WebserverSecurityGroup', {
      vpc: cluster.vpc,
      allowAllOutbound: true,
    });

    // Create ECS security group ingress rule
    securityGroup.addIngressRule(ec2.Peer.anyIpv4(), ec2.Port.tcp(80), 'Allow HTTP access from the Internet');

    // Create ECS security group egress rule
    securityGroup.addEgressRule(ec2.Peer.anyIpv4(), ec2.Port.tcp(80), 'Allow HTTP access to the Internet');

  }
}
Great job! Our cluster is now ready to be up and running.
Deploy the stack by using cdk deploy.
Testing our resources
Let's now move ahead and see if our cluster is working as expected.
Go to Elastic Container Services in AWS and click on clusters. You will find that our cluster is created.
You might have to wait for some time before the cluster goes into a running state.

Now go to the networking section to find the endpoint of the load balancer.

Click on the endpoint to see if we can reach the web server.

Awesome! We can now see that the Apache web server is displayed which means that our container is up and running inside the ECS cluster.
Wrapping up
This article helps you to automate the creation of an ECS cluster and run your containerized application using a custom docker image in it. This would come in handy if you want to deploy your containerized application in a single AWS account.
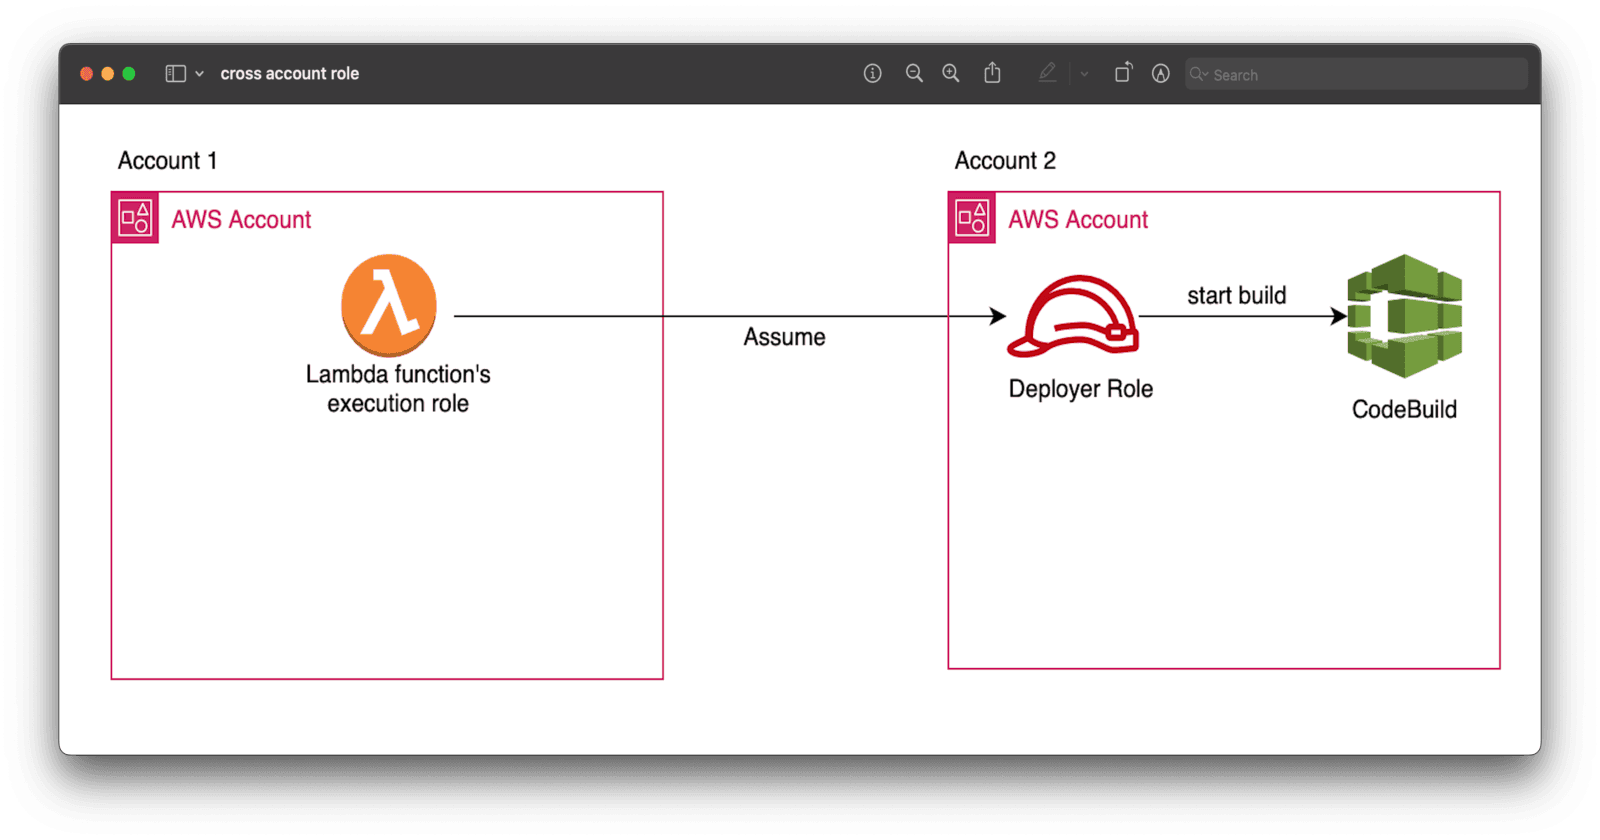
However, if you want to deploy your application cross-account, I'd suggest creating a pipeline for the deployment of the same.
Hope you gained some insights from this article. Follow me for more cloud and DevOps related content.
See you in cloud!
Vishnu S.